Welcome to life after the Death Stranding, folks!
Death Stranding is a game in which you never seem to stop unlocking things, and that’s only gotten worse (or better, if you’re an unlock addict) with the Director’s Cut. So I’m going to walk you through every single unlock in the game.
I will mark every unlock with a category, so that you can do a Ctrl F search to find any items from a specific category. Here’s a full list of categories for easy reference:
- BB Pod Color
- Backpack Accessory
- Backpack Color
- Backpack Equipment
- Backpack Patch
- Blueprint
- Cap Color
- Cuff Links Feature
- Facility Terminal Option
- Firing Range Drill
- Hologram
- Interview Data
- “Ludens Mask” Sunglasses Frame Color
- “Ludens Mask” Sunglasses Lens Color
- Music Track
- Odradek Feature
- “Sam” Sunglasses Frame Color
- “Sam” Sunglasses Lens Color
- Tool
- Vehicle Color
Note that this guide is specifically for Death Stranding Director’s Cut, which means it will feature items that weren’t in the original version of the game. I’m also including the Deluxe Edition unlocks in this list, so I’ll mention those where relevant.
So let’s get chasing that cargo high!
“Ludens Mask” Sunglasses
These are unlocked by default, but later on you will be unlocking customization options for them. I’m including them here simply to mention the default color options:
- “Ludens Mask” Sunglasses Frame Color: Snow White
- “Ludens Mask” Sunglasses Frame Color: Stealth Black
- “Ludens Mask” Sunglasses Frame Color: Bridges Orange
- “Ludens Mask” Sunglasses Frame Color: Navy Blue
- “Ludens Mask” Sunglasses Frame Color: Blood Red
- “Ludens Mask” Sunglasses Frame Color: Signal Green
- “Ludens Mask” Sunglasses Frame Color: Prismatic Purple
- “Ludens Mask” Sunglasses Lens Color: Black
- “Ludens Mask” Sunglasses Lens Color: Clear
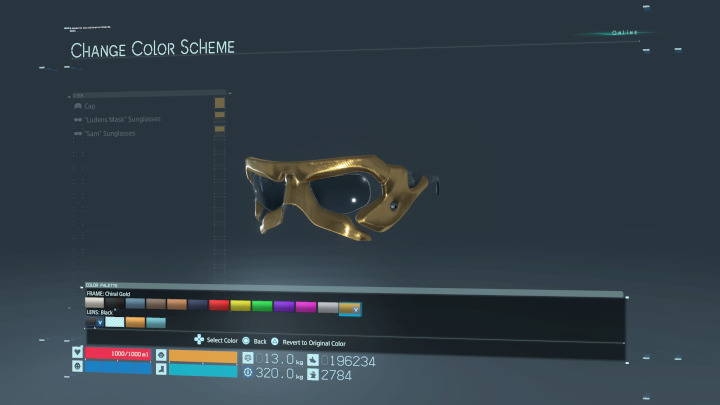
If you own the Digital Deluxe Edition, you’ll also have access to:
- “Ludens Mask” Sunglasses Frame Color: Omnireflector
- “Ludens Mask” Sunglasses Frame Color: Chiral Gold
You will unlock more color options later on.
Firing Range

The Firing Range is a new feature in Death Stranding Director’s Cut. It allows you to test out weapons before taking them out into the field. Your options at the firing range will continue to expand as you unlock more weapons.
To unlock the Firing Range, simply collect any weapon in the game. I’ve seen other game guides that give contradictory information, but the real way to unlock the Firing Range is to simply acquire any weapon. When and where you unlock it will vary from player to player, though you will certainly have it before you complete Episode 2. The earliest place to unlock the Firing Range is the optional [Order No. 77], while the latest place you’d possibly unlock it would be [Order No. 14] at the end of Episode 2.
I believe unlocking the firing range will also automatically unlock one drill:
- Firing Range Drill 3: [Strand] Eliminate all MULEs
You can also unlock holograms by completing drills. It seems like you earn holograms every few drills, but I had a lot of variance between my two save files, so it’s hard to say what the exact requirements are for each hologram.
- Hologram: Ludens Duck: Yellow
- Hologram: Ludens Duck: Red
- Hologram: Ludens Duck: Green
- Hologram: Ludens Duck: Dark Blue
- Hologram: Ludens Duck: Reddish Brown
- Hologram: Ludens Duck: White
- Hologram: Ludens Duck: Brown
- Hologram: Ludens Duck: Blue
Complete all 28 drills to earn:
- Backpack Equipment: Spare Ammo Pouch (Lv. 2)
Score an S-rank on all 28 drills to earn:
- Backpack Patch 50: Like
The Racetrack
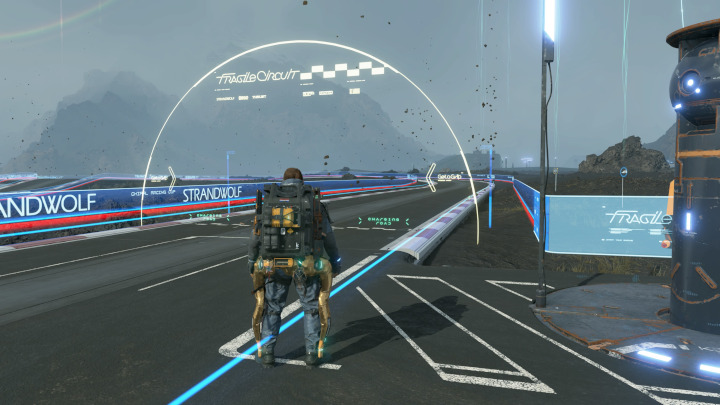
Once you complete [Order No. 35], you should receive a yellow-letter email from Thomas Southerland letting you know about the racetrack option. It’s just to the south of the Timefall Farm, and you’ll have to rebuild it before you can make use of it (just like any other auto-paver option).
To build it, you’ll need:
- 650 Chiral Crystals
- 2,240 Metals
- 1,960 Ceramics
If you play online, you won’t have to do all of this yourself, as other people’s contributions will show up here.
There are a few additional unlocks you can earn here.
Earn S-rank in all four Reverse Trike races to unlock:
- Hologram: Reverse Trike
Earn S-rank in any Roadster race to unlock:
- Blueprint: Roadster
Earn S-rank in all four Roadster races to unlock:
- Blueprint: Roadster: Long Range
- Hologram: Roadster
Earn S-rank in all four Truck races to unlock:
- Hologram: Truck
Complete all 12 races to unlock:
- Backpack Patch 31: Fragile
Order-Specific Unlocks
Now let’s chow down on the real meat of Death Stranding unlocks.
Over the course of the game, you will unlock a good number of things by completing deliveries. Typically, these will be listed under “Orders for Sam” rather than “Standard Deliveries.” Many of these are mandatory to progress the story, but there are also optional deliveries that contain unlocks.
Here’s a complete list of unlocks for completing delivery missions:
[Order No. 1] Smart Drug Delivery
This is the Prologue delivery.
- Music Track: “Don’t Be So Serious” – LOW ROAR
[Order No. 3] [TOP SECRET] Cremation: President’s Body
This is the Episode 1 delivery. Deliver the President’s body from Capital Knot City to the incinerator, then return.
- Music Track: “Bones” – LOW ROAR
- Music Track: “Poznan” – LOW ROAR
At this point, you should also have access to the default music tracks:
- Music Track: “Yellow Box” – The Neighbourhood
- Music Track: “Ghost” – Alan Walker & Au/Ra
- Music Track: “Trigger – Khalid & Major Lazer
- Music Track: “Meanwhile… In Genova” – The S.L.P.
- Music Track: “Ludens” – Bring Me The Horizon
- Music Track: “Pop Virus” – Gen Hoshino
- Music Track: “Fragile” – Midge Ure
- Music Track: “Alone” – Biting Elbows
- Music Track: “Path” – Apocalyptica
- Music Track: “Path Vol. 2” – Apocalyptica
[Order No. 4] Smart Drug Delivery: Waystation West of Capital Knot City
This is the first delivery of Episode 2. Deliver smart drugs from Capital Knot City to Waystation West of Capital Knot City.
- Blueprint: Ladder
- Blueprint: Climbing Anchor (Lv. 1)
- Blueprint: Postbox – PCC (Lv. 1)
- Facility Terminal Option: Fabricate Equipment
- Facility Terminal Option: Make Delivery -> Deliver Lost Cargo
- Facility Terminal Option: Share Locker -> Donate Weapons & Equipment
- Facility Terminal Option: Share Locker -> Withdraw Cargo
[Order No. 5] Rare Metal Delivery: Distribution Center West of Capital Knot City
This is another Episode 2 delivery. Deliver rare metals from Waystation West of Capital Knot City to Distribution Center West of Capital Knot City.
- Interview Data: MULEs and Drone Syndrome
- Interview Data: Bridge Babies
- Interview Data: Timefall
- Cuff Links Feature: MAIL
- Cuff Links Feature: DATA
- Facility Terminal Option: Recycle (Facility terminal option)
After you complete this order and pick up your first delivery at Distribution Center West of Capitol Knot City, there is an additional unlock (no matter which of the two orders you pick up).
- Blueprint: Watchtower – PCC (Lv. 1)
[Order No. 7] Recovery: Chiral Printer Interface
This is an Episode 2 delivery that you’ll pick up at Distribution Center West of Capitol Knot City.
- Blueprint: Bridges Boots (Lv. 1)
- Interview Data: Necrosis and the Ancient Egyptian View of Life and Death
- Interview Data: Two Years Ago – Distribution Center West of Capital Knot City
- Interview Data: The Chiral Network I
- Blueprint: Bridge (PCC Lv. 1)
[Order No. 8] Collect: Chiral Crystals
This is an Episode 2 delivery that you’ll pick up at Distribution Center West of Capitol Knot City.
- Tool: Crystal Collector
- Blueprint: Container Repair Spray
- Interview Data: Chiral Symmetry
- Interview Data: Chiralium
- Facility Terminal Option: Claim Materials
[Order No. 77] Collection: Cargo Discovered in the Ruined Factory (Maser Gun Recommended)
This is an optional mission that will be available at Distribution Center West of Capitol Knot City after you complete [Order No. 7] and [Order No. 8].
When you pick up the mission, you’ll get the Maser Gun, though you won’t get the blueprints for it until you complete the mission. When you start the mission, you’ll also unlock:
- Firing Range Drill 1: [Maser Gun] Destroy all Targets
- Firing Range Drill 2: [Maser Gun] Eliminate all MULEs
By completing the mission, you’ll unlock:
- Blueprint: Support Skeleton
- Blueprint: Maser Gun
- Music Track: “Pale Yellow” – Woodkid
- Interview Data: Memo #1: A Call to Arms
[Order No. 78] Stealthy Collection: Data from the Ruined Factory Interior
This is an optional mission that will be available at Distribution Center West of Capital Knot City after you complete [Order No. 77].
- Music Track: “Goliath” – Woodkid
- Interview Data: Memo #2: From Mother to Daughter
- Interview Data: A Porter’s Note #1: To Our Beloved Daughter
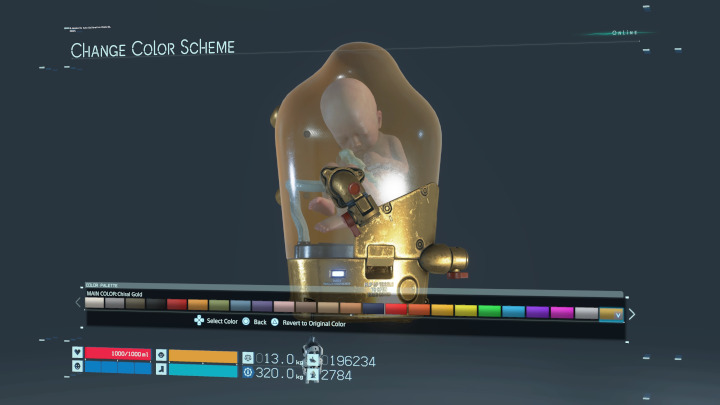
- BB Pod Customization
Your default BB Pod options are:
- BB Pod Color: Snow White
- BB Pod Color: Wolf Gray
- BB Pod Color: Olive Drab
- BB Pod Color: Stealth Black
- BB Pod Color: Mars Red
- BB Pod Color: Emergency Yellow
- BB Pod Color: Grass Green
- BB Pod Color: Cool Blue
- BB Pod Color: Express Purple
- BB Pod Color: Desert Pink
- BB Pod Color: Coyote Brown
- BB Pod Color: Sandy Tan
- BB Pod Color: Bridges Orange
- BB Pod Color: Navy Blue
- BB Pod Color: Blood Red
- BB Pod Color: Volcanic Orange
- BB Pod Color: Bright Yellow
- BB Pod Color: Ghost Green
- BB Pod Color: Signal Green
- BB Pod Color: Lightning Blue
- BB Pod Color: Prismatic Purple
- BB Pod Color: Rose Pink
- BB Pod Color: Carbon Fiber
If you have purchased the Digital Deluxe Edition, you’ll also have access to:
- BB Pod Color: Chiral Gold
- BB Pod Color: Omnireflector
[Order No. 9] Power Supply Unit Delivery: Wind Farm
This is an Episode 2 delivery that you’ll pick up at Distribution Center West of Capitol Knot City.
- Interview Data: Humanity’s Biggest Problem? Logistics
- Interview Data: Chiral Contamination I
- Interview Data: The Discovery of Beaches and the Concept of Death
- Blueprint: Generator – PCC (Lv. 1)
- Cuff Links Feature: SUPPLY REQUESTS
- Cuff Links Feature: BRIDGE LINKS
- Facility Terminal Option: Take on Orders -> Standard Orders
- Facility Terminal Option: Make Delivery -> Deliver Requested Supplies
- Facility Terminal Option: Entrust Cargo (Facility terminal option)
- Facility Terminal Option: Garage (Facility terminal option)
[Order No. 11] [URGENT] Resins Delivery: Distribution Center West of Capital Knot City
This is an Episode 2 delivery that you’ll pick up at Wind Farm.
- Music Track: “Anything You Need” – LOW ROAR
- Interview Data: Chiral Contamination II
- Interview Data: BT’s are Reaching Out to Us
[Order No. 13] [URGENT] Cryptobiote Delivery: Capital Knot City
This is an optional delivery that can be picked up at Distribution Center West of Capital Knot City. You’ll need to deliver a container of cryptobiotes to Capital Knot City without submerging them in water.
- Music Track: “Easy Way Out” – LOW ROAR
[Standard Order No. 100] [URGENT] Delivery: Tranquilizers
This is an optional order that you’ll pick up at Capital Knot City. You’ll need to deliver some tranquilizers to Waystation West of Capital Knot City as fast as you can.
- Backpack Color: Rose Pink
[Order No. 14] Aid Package Delivery: Port Knot City
This is an Episode 2 order that you’ll pick up at Capital Knot City. It asks you to deliver aid packages from Capital Knot City to Port Knot City. Yes, this means you’ll be traveling across the entire Eastern Region map, from east to west. Just for picking up this order, you will unlock:
- Blueprint: Blood Bag
- Blueprint: Hematic Grenade (Lv. 1)
- Firing Range Drill 4: [Thrown Weapons] Destroy all Targets
- Firing Range Drill 6: [Thrown Weapons] Eliminate all BTs
Once you complete the order, you’ll unlock:
- Music Track: “Asylums For The Feeling feat. Leila Adu” – SILENT POETS
- Interview Data: The Chiral Network Experiments Between Central and Capital I
- Interview Data: The Chiral Network Experiments Between Central and Capital II
- Interview Data: MULEs and Local Porters
- Interview Data: Timefall and Power Failures
[Order No. 18] Aid Package Delivery: Lake Knot City
This is the first delivery of Episode 3. You’ll take three containers of aid to Lake Knot City, starting from the pier where you first arrive in the Central Region.
- Ceramics can be used at all UCA-affiliated facilities
- Blueprint: Smoke-Emitting Decoy Cargo
- Interview Data: Preppers
- Interview Data: The Lake at Ground Zero
- Fast Travel (Fragile Jumping)
Note that even though “Patience” by LOW ROAR plays during this sequence, you won’t unlock it for your Music Player until later. I’m guessing this was a joke, due to the song’s title…
[Order No. 23] Retrieval: System Server
This is an Episode 3 delivery that you’ll pick up from Lake Knot City once you’ve successfully made a delivery to the Engineer, the Elder, and the Craftsman. It has you retrieve a system server from a lockbox at a MULE camp.
- Blueprint: Reverse Trike
- Blueprint: Reverse Trike: Long Range
- Interview Data: Higgs Particles
[Order No. 24] Prototype Bot Delivery: Distribution Center South of Lake Knot City
This is an Episode 3 delivery that you’ll pick up from Lake Knot City after you’ve completed [Order No. 23]. You’ll need to take a prototype to the Distribution Center South of Lake Knot City.
- Autonomous Delivery Bot
[Order No. 27] Chiralium Gauge Delivery: Weather Station
This is an Episode 3 order that you’ll pick up at Distribution Center South of Lake Knot City once you’ve completed [Order No. 24].
- Special alloys can now be used at all UCA-affiliated facilities
- Blueprint: Timefall Shelter – PCC
- Blueprint: Safe House – PCC (Lv. 2)
- Cuff Links Feature: WEATHER FORECAST
[Order No. 28] Wheat Seed Delivery: Timefall Farmers
This is an Episode 3 order that you’ll pick up at Weather Station once you’ve completed [Order No. 27].
- Music Track: “I’m Leaving” – LOW ROAR
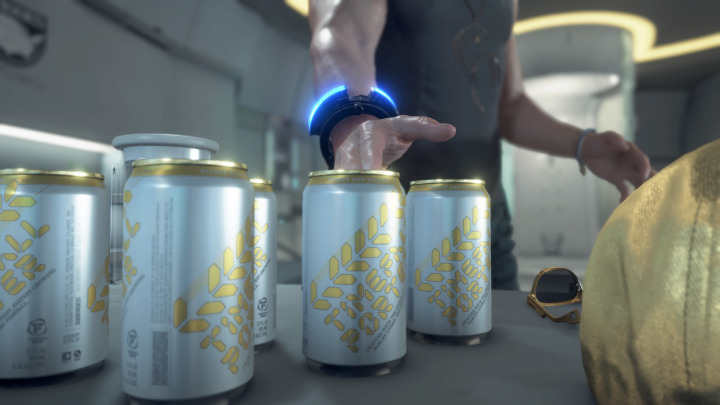
[Order No. 229] Delivery (Fragile): Timefall Porter
This is an optional order that’s actually listed as a Standard Order instead of an Order for Sam. It will become available once you complete [Order No. 27] and receive a yellow-letter email from Thomas Southerland. This one has you delivering some Timefall Porter from the Timefall Farm to Distribution Center South of Lake Knot City. If you’re successful, you’ll unlock:
- Timefall Porter
This will replace your Bridges energy drink in your private room.
[Order No. 31] Tablet Delivery: Film Director
This is an Episode 3 delivery, which will be available at Distribution Center South of Lake Knot City after completing [Order No. 28].
- “Sam” Sunglasses
The default colors are:
- “Sam” Sunglasses Color: Snow White
- “Sam” Sunglasses Color: Stealth Black
- “Sam” Sunglasses Color: Bridges Orange
- “Sam” Sunglasses Color: Navy Blue
- “Sam” Sunglasses Color: Blood Red
- “Sam” Sunglasses Color: Signal Green
- “Sam” Sunglasses Color: Prismatic Purple
If you own the Digital Deluxe edition of the game, you’ll also have access to:
- “Sam” Sunglasses Color: Omnireflector
- “Sam” Sunglasses Color: Chiral Gold
[Order No. 33] Hourglass Delivery: Chiral Artist
You’ll pick up this order from the Junk Dealer as part of Episode 3. He’s going to make you deliver an hourglass to the Chiral Artist, but you have to do it by hand. For picking yo the order, you’ll get to use the Speed Skeleton (Lv. 1). You won’t get the blueprints yet, however.
[Order No. 34] Chiral Artist Delivery: Junk Dealer
You’ll pick up this order at the Chiral Artist’s Studio. It requires you to deliver the actual Chiral Artist to the Junk Dealer so they can pick up their relationship after they both assumed the other had died. It’s a whole thing.
- Music Track: “Give Up” – LOW ROAR
[Order No. 35] Prototype Delivery: Distribution Center South of Lake Knot City
This is an order that you’ll pick up from the Junk Dealer after completing [Order No. 34]. You need to bring two crates (containing a prototype) to Distribution Center South of Lake Knot City.
- Blueprint: Truck
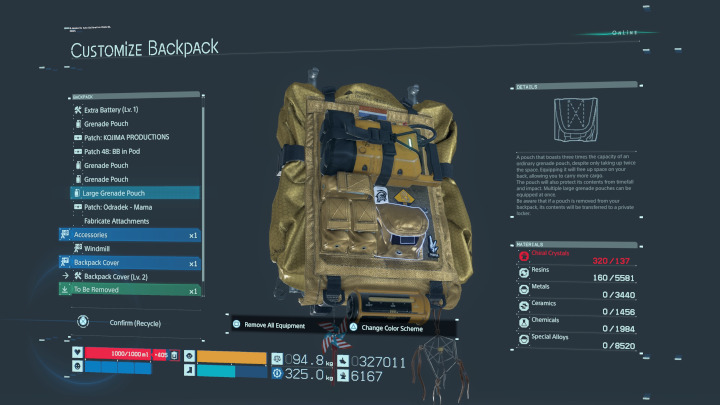
- Backpack Customization
You have a ton of backpack options by default. First off, you’ve got:
- Backpack Accessory: Windmill
You can also adjust the color of your backpack:
- Backpack Color: Snow White
- Backpack Color: Stealth Black
- Backpack Color: Bridges Orange
- Backpack Color: Navy Blue
- Backpack Color: Blood Red
- Backpack Color: Signal Green
- Backpack Color: Prismatic Purple
Then you’ve got some equipment:
- Backpack Equipment: Grenade Pouch
- Backpack Equipment: Extra Battery (Lv. 1)
Aside from equipment, you can also add patches:
- Backpack Patch 1: Reverse Trike
- Backpack Patch 3: A-
- Backpack Patch 4: A+
- Backpack Patch 5: B-
- Backpack Patch 6: B+
- Backpack Patch 7: O-
- Backpack Patch 8: O+
- Backpack Patch 9: AB-
- Backpack Patch 10: AB+
- Backpack Patch 48: BB in Pod
And if you have the Digital Deluxe edition of the game, you’ll also have:
- Backpack Patch: Odradek – Attention
- Backpack Patch: Odradek – Caution
- Backpack Patch: Odradek – Danger
- Backpack Patch: Odradek – Emergency
- Backpack Patch: Odradek – Mama
- Backpack Patch: Odradek – KOJIMA PRODUCTIONS
And you can unlock even more throughout the game.
[Order No. 36] Retrieval: Sticky Guns
This is an optional delivery that you’ll pick up at Distribution Center South of Lake Knot City. You’ll need to retrieve some Sticky Guns from a MULE camp, then deliver them all the way to South Knot City. There are six containers, but you only need to deliver one to complete the delivery.
For picking up the order, you’ll get one Sticky Gun to try out. You’ll also unlock:
- Firing Range Drill 11: [Sticky Gun] Recover All Cargo 1
For completing the order, you’ll unlock:
- Blueprint: Sticky Gun
- Music Track: “Waiting (10 Years)” – LOW ROAR
[Order No. 37] Sewing Kit Delivery: Cosplayer
This optional delivery should show up toward the end of Episode 3 at the Distribution Center South of Lake Knot City. Here, you’ll meet the cosplayer and her partner…
- Otter Hood
[Order No. 38] Emergency Provisions Delivery: South Knot City
This is the last delivery of Episode 3. You’ll pick it up at Lake Knot City…
- Hologram: Fragile: Attentive
- Hologram: Fragile: Bidding Goodbye
- Music Track: “Gosia” – LOW ROAR
- Music Track: “Without You” – LOW ROAR
Complete Chapter 4
Once you begin Chapter 5, you’ll need to visit Mama at her lab. Once you do, you’ll learn a new PCC structure. There’s no delivery order attached to this unlock.
- Blueprint: Zip-Line – PCC (Lv. 2)
[Order No. 42] Collection: Scattered Rare Mineral Resources
This is the first order of Episode 5, and it lets you test out those fancy new Zip-Lines.
- Chemicals can now be used at UCA-affiliated facilities
[Order No. 80] Delivery: Vog-Preserved Liquid Metal Resources
This is an optional order that you’ll pick up at the Weather Station. You’ll need to deliver some cargo to Distribution Center South of Lake Knot City.
- Blueprint: Jump Ramp – PCC (Lv. 2)
[Order No. 81] Delivery: Vog-Preserved Water-Soluble Resources for Material Development
This is an optional order that you’ll find at the Chiral Artist’s Studio. It asks you to deliver some cargo to Distribution Center South of Lake Knot City.
- Blueprint: Chiral Bridge – PCC (Lv. 2)
[Order No. 83] Rescue: Porter Carrying Bot Research Data
This order should come up early in Episode 5, and it can be picked up at Distribution Center South of Lake Knot City. It asks you to rescue a porter who’s stranded, and to recover the bot research data he’s carrying.
- Music Track: “Control” – Biting Elbows
- Blueprint: Buddy Bot
[Order No. 41] Building Materials Delivery: Waystation North of Mountain Knot City
This is an Episode 5 delivery that you’ll pick up at Distribution Center South of Lake Knot City. Starting this mission should unlock:
- Firing Range Drill 12: [Sticky Gun] Recover All Cargo 2
Complete the delivery to unlock:
- Music Track: “Breathe In” – LOW ROAR
[Order No. 44] Antimatter Bomb Delivery: Mountain Knot City
This is an Episode 5 delivery that you’ll pick up at Distribution Center North of Mountain Knot City. It asks you to deliver an antimatter bomb to Mountain Knot City. Be careful!
- Music Track: “Because We Have To” – LOW ROAR
[Order No. 46] Mama Delivery: Mountain Knot City
This is an Episode 5 delivery that you’ll pick up at Mama’s Lab. You’ll have to deliver Mama all the way from her lab to Mountain Knot City.
- Hologram: Mama: Loving
- Hologram: Mama: Connected
- Hologram: Lockne: Encouraging
- Hologram: Lockne: Connected
- Music Track: “Once in a Long, Long While…” – LOW ROAR
- Music Track: “The Machine” – LOW ROAR
- Interview Data: The Terrorist View of Bridges
- Interview Data: BTs and Voidouts
- Interview Data: Lockne and Målingen
- Backpack Equipment: Stabilizer
- Blueprint: Cargo Catapult – PCC (Lv. 2)
- Tool: Cord Cutter
[Order No. 84] Rescue: Porter Injured in the Mountains
In the beginning of Episode 6, you should see this order appear at the terminal at Mountain Knot City. This one has you rescue a porter who got stranded in the mountains.
- Buddy Bot Color: Snow White
- Buddy Bot Color: Wolf Gray
- Buddy Bot Color: Stealth Black
- Buddy Bot Color: Bridges Orange
- Buddy Bot Color: Navy Blue
- Buddy Bot Color: Blood Red
- Buddy Bot Color: Signal Green
- Buddy Bot Color: Prismatic Purple
[Order No. 51] Photograph Delivery: Photographer
Once you convince the Mountaineer to join the UCA, a new order will appear at his terminal asking you to deliver a photograph to the Photographer.
- Music Track: “Rolling Over” – LOW ROAR
[Order No. 52] Retrieval: Camera
You’ll be able to pick this one up at the Photographer’s bunker as soon as you complete [Order No. 51].
- Music Track: “St. Eriksplan” – LOW ROAR
[Order No. 85] Rescue: Rookie Porter Who’s In Trouble
This optional delivery should show up at Distribution Center North of Mountain Knot City in Episode 6. As the name suggests, it asks you to rescue a porter who got a little lost.
- Music Track: “Other Me” – Biting Elbows
- Buddy Bot Color: Olive Drab
- Buddy Bot Color: Mars Red
- Buddy Bot Color: Emergency Yellow
- Buddy Bot Color: Grass Green
- Buddy Bot Color: Cool Blue
- Buddy Bot Color: Express Purple
- Buddy Bot Color: Desert Pink
- Buddy Bot Color: Coyote Brown
- Buddy Bot Color: Sandy Tan
- Buddy Bot Color: Volcanic Orange
- Buddy Bot Color: Bright Yellow
- Buddy Bot Color: Ghost Green
- Buddy Bot Color: Lightning Blue
- Buddy Bot Color: Rose Pink
- Buddy Bot Color: Omnireflector
- Buddy Bot Color: Chiral Gold
Note that the Omnireflector and Chiral Gold Buddy Bot Colors are only for those who own the Digital Deluxe Edition of the game.
Complete Episode 7
- Interview Data: From the Report on the Voidout in Manhattan #1
- Interview Data: From the Report on the Voidout in Manhattan #2
- Interview Data: From the Report on the Voidout in Manhattan #3
[Order No. 55] Corpse Delivery: Heartman’s Lab
This is an order you’ll pick up at Mountain Knot City during Episode 8. It asks you to deliver a corpse to Heartman’s Lab for investigation.
Note that “Without You” by LOW ROAR should play during this delivery, but you should have already unlocked the music track back in Episode 3.
[Order No. 56] Recovery: Winter Clothes
This optional order should appear at Mountain Knot City once you begin Episode 8. It asks you to retrieve Deadman’s clothing.
I honestly don’t know if this changes anything or not. Part of me suspects that it will affect the clothing that Deadman wears in the last part of the game, but I wasn’t able to confirm whether or not this is actually true.
[Order No. 59] Antimatter Bomb Delivery: Paleontologist
This is an Episode 8 order that you’ll pick up at Heartman’s Lab. You’ll need to carry an antimatter bomb over a freaking mountain, so good luck with that.
- Music Track: “Patience” – LOW ROAR
[Order No. 60] Recovery: Ammonites
You’ll pick this up in Episode 8 from the Paleontologist once you complete [Order No. 59]
- Interview Data: Neanderthals Are Not Extinct
- Interview Data: Heartman’s Theory of Evolution
- Interview Data: Umbilical Cords in Devonian-Era Fossils
[Order No. 62] Repair: Chiral Relay
You’ll pick this order up at Heartman’s Lab at the end of Episode 8. It asks you to deliver resources to the Chiral Relay.
- Hologram: Heartman: Sending Likes
- Hologram: Heartman: Resuscitation
Note: “Almost Nothing feat. Okay Kaya” by Silent Poets should play during this mission, but you won’t unlock it for your music player quite yet.
[Order No. 63] Network Activation Key Delivery: Edge Knot City
This is an Episode 9 delivery that you’ll pick up at Distribution Center North of Edge Knot City.
- Blueprint: Quadruple Rocket Launcher
- Interview Data: Human Sacrifices Under London Bridge
- Interview Data: Bridgmanite in the Earth’s Mantle
- Backpack Patch 18: Edge Knot City
- Firing Range Drill 7: [Thrown Weapons] Eliminate all Jellyfish
- Firing Range Drill 17: [Handgun/Assault Rifle] Eliminate all Jellyfish
- Firing Range Drill 22: [Shotgun] Eliminate all Jellyfish
- Firing Range Drill 27: [Grenade/Rocket Launcher] Eliminate all Jellyfish
[Order No. 65] Elimination: Higgs
This is the final order from Chapter 9, and it asks you to face off against Higgs.
- Misanga from Fragile
Note that Fragile gives the Misanga back to Sam at this point; this isn’t where you unlock it for the first time.
[Order No. 66] [URGENT] Fresh Pizza Delivery: Peter Englert
This optional order should pop once you complete Episode 9 (you’ll get an email letting you know it’s available). This one has you delivering a hot pizza from the First Prepper all the way to Peter Englert’s bunker, which should now be open.
- Interview Data: A Letter from a Porter #1
- Interview Data: A Letter from a Porter #2
[Order No. 67] Escape the Battlefield
This order is basically all of Episode 11.
- Interview Data: Locked-In Syndrome
- Interview Data: About the Dreamcatcher
- Interview Data: Quipus
[Order No. 69] Go to Her Beach
This order is basically all of Episode 13.
- Hologram: Die-Hardman: Encouraging
- Hologram: Die-Hardman: Prideful
- Hologram: Deadman: Admiring
- Hologram: Deadman: Concerned
- Hologram: Amelie: Beckoning
- Hologram: Amalie: Yearning
Complete Episode 14
- Music Track: “Not Around” – LOW ROAR
- Music Track: “Please Don’t Stop (Chapter 1)” – LOW ROAR
- Music Track: “Tonight, Tonight, Tonight” – LOW ROAR
- Music Track: “Please Don’t Stop (Chapter 2)” – LOW ROAR
- Music Track: “I’ll Keep Coming” – LOW ROAR
- Music Track: “Almost Nothing feat. Okay Kaya” – Silent Poets
- Music Track: “BB’s Theme” – Ludvig Forssel feat. Jenny Plant
- Interview Data: Journal #24
- Interview Data: Journal #25
- Interview Data: Journal #26
- Interview Data: About Sam’s Return
- New Private Room Feature: Memories of Cliff
- Backpack Patch 49: I Love BB
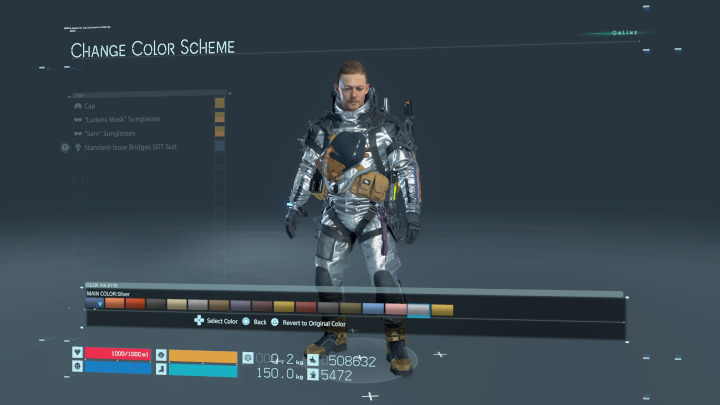
And finally, you can finally change your suit color! Here are your options:
- Suit Color: SDT Blue
- Suit Color: CDT Orange
- Suit Color: Medic Red
- Suit Color: Security Black
- Suit Color: Engineer Ivory
- Suit Color: Porter White
- Suit Color: MULE Brown
- Suit Color: MULE Purple
- Suit Color: MULE Violet
- Suit Color: MULE Yellow
- Suit Color: MULE Red
- Suit Color: MULE Gray
- Suit Color: Terrorist Green
- Suit Color: Fragile Blue
- Suit Color: BB Pink
- Suit Color: Silver
- Suit Color: Gold
[Order No. 79] Delivery: Data Transfer Unit to the Ruined Factory
Once you complete the game, you’ll finally have access to the rest of the Ruined Factory (remember this from the beginning of the game?) Now you can complete this quest chain and learn some secrets about a particular character.
- Interview Data: Memo #3: From Mother to Daughter
- Interview Data: A Porter’s Note #2: To Our Beloved Daughter
- BB Pod Color: Wood Grain
- BB Pod Color: Iridescent
- BB Pod Color: Check
- BB Pod Color: Stickers
- BB Pod Color: Leather
Death Stranding/Half-Life Collaboration Unlocks
The PC version of Death Stranding had some additional content in cooperation with Valve, and all of that content is included in the Director’s Cut as well.
During Episode 2, you should receive an email called “[λ] How About Taking a Break in the Private Room?” from Benjamin Hancock. From that point on, you’ll start getting yellow-text emails marked with the Lambda symbol [λ], asking you to recover specific cargo. Each email will give you a vague location for the cargo, and if you find and return it, you’ll get a piece of Valve-related gear.
Note that unlike the Cyberpunk 2077 deliveries, these ones don’t have official delivery requests that need to be activated at a terminal.
[Test Order] [λ] I Want You to Look for Some Lost Cargo
Benjamin Hancock wants you to find a cube that got lost along the river outside Distribution Center West of Capital Knot City. Follow the river to the northeast and you should find it. Bring it back to de Distribution Center West of Capital Knot City to claim your reward.
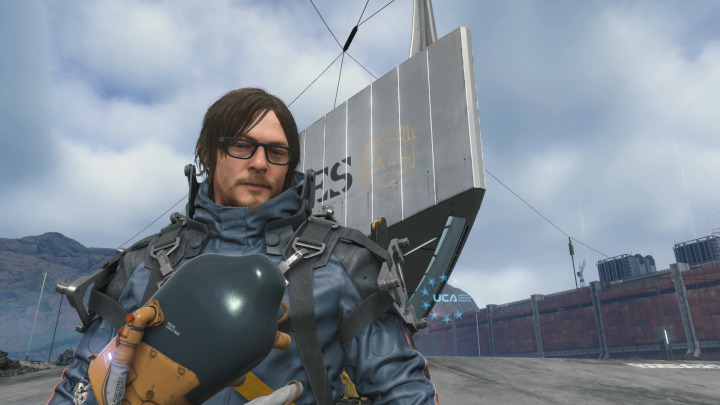
- Gordon Glasses
[Test Order] [λ] Find my Lost Cargo, Please!
Shortly after you complete [Order No. 23], you should receive an email from William Lake asking you to find his Companion Cube, which he lost out by Peter Englert’s shelter. Peter Englert is the guy who you’ll be delivering pizza to once you unlock the pizza delivery missions, in case you’re not sure who you’re looking for.
- Valve
[Test Order] [λ] You’ve Got to Find my Cube!
Once you complete [Order No. 28], you should receive an email from Thomas Southerland asking you to find another Companion Cube. This one should be northwest of Distribution Center South of Lake Knot City in a MULE camp. Surprisingly, it’s just sitting in the camp, and it’s not in a postbox.
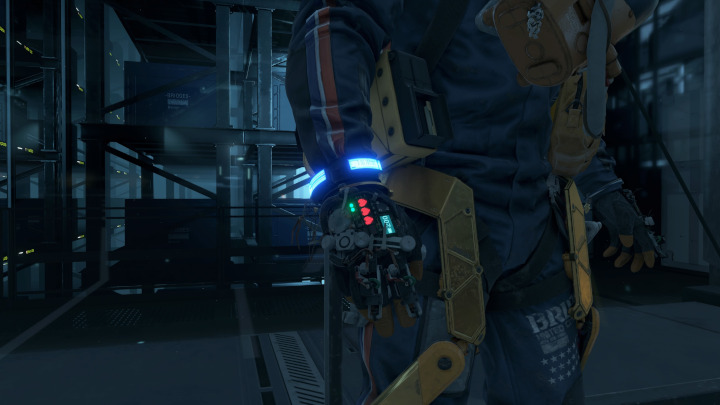
- Blueprint: Gravity Gloves
[Test Order] [λ] Sorry. More Lost Cargo for You…
Once you complete [Order No. 35], you should get another email from Thomas Southerland asking about a Companion Cube. This one is in the dilapidated factory northwest of the Craftsman’s bunker. Find it, then bring it back to Distribution Center South of Lake Knot City for your reward.
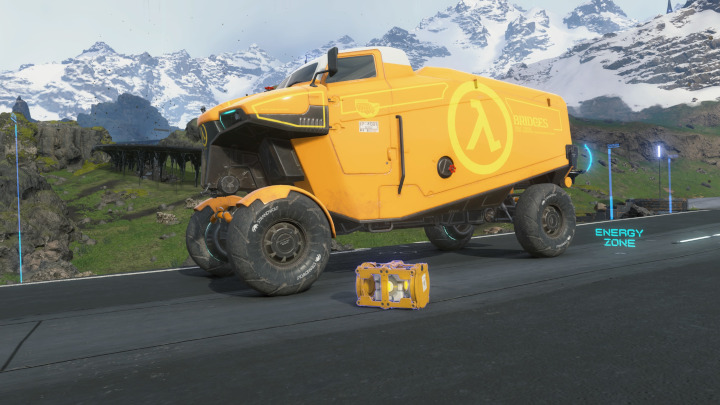
- Blueprint: Truck (λ Type)
[Test Order] [λ] Could You Please Go Look for My Cube?
After completing [Order No. 60], you’ll get an email from the Paleontologist asking you to fetch another Companion Cube. This one is south of the heart-shaped lake in an old ruin that’s crowded with BTs. When you find it, bring it back to the Paleontologist.
This one was the hardest to find for me personally, but none of them are really too difficult if you use your scanner. Here’s a map in case you need it:
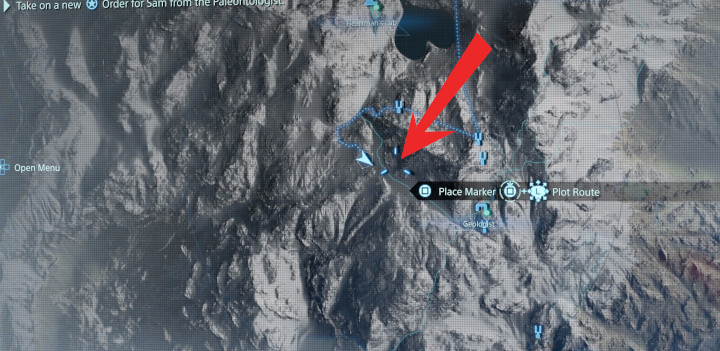
Now just return it to the Paleontologist to claim your reward.
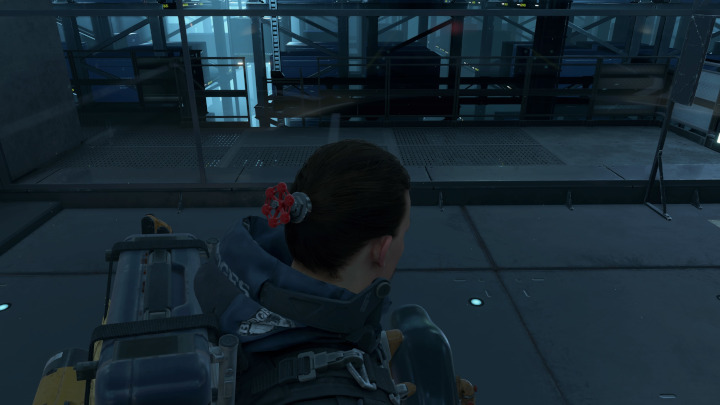
- Headcrab Cap
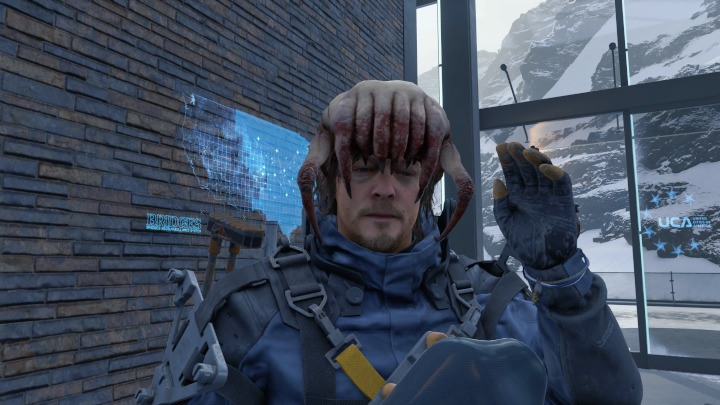
[λ] Have You Been Getting Some Weird Emails…?
Once you complete the game, you’ll get another email with one last request. This one wants you to collect the sixth Companion Cube somewhere beyond the tar belt near Middle Knot City and then incinerate it.
In case you’re not sure where to look, it’s here on the map:
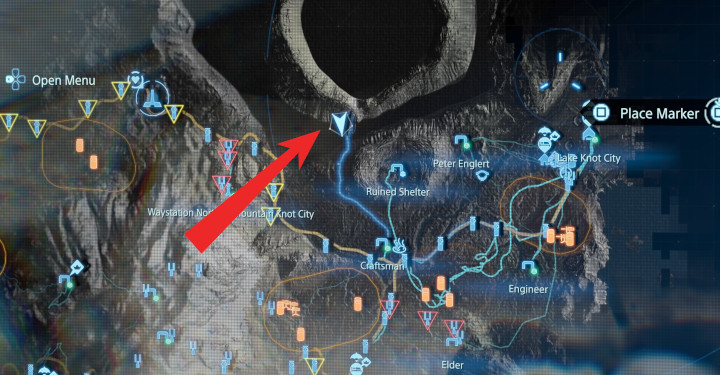
You might need to get creative to get across the tar. I used a jump ramp to hurl myself over, then I built a zip-line to get back (I set up my first zip-line post before I made the jump).
Once you collect the Companion Cube, you’ll need to bring it to Incinerator West of Lake Knot City and chuck it in. Once you do, you’ll unlock your final Half-Life-themed reward.
- Hologram: Strider (Half-Life: Alyx)
And there you go! You’ve completed the Portal/Half-Life deliveries in Death Stranding! You will get a very special email to commemorate all this…
Death Stranding/Cyberpunk 2077 Collaboration Unlocks
The PC version of Death Stranding also brought Cyberpunk 2077-themed items into the game, and those are in the Director’s Cut as well. Just like with the Valve collab items, you’ll receive emails instructing you on what to do. You should look for your first email once you complete [Order No. 24] in Episode 3. You’ll be able to spot these emails, because they have a [V] in the subject line.
Now, a lot of other guides I’ve seen leave out an important detail: The rewards are more than cosmetic. Yes, there’s a bunch of cool Cyberpunk 2077 cosmetic stuff to look at, but you’ll also receive upgrades for your compass that let you hack sensor poles, enemy odradeks, and even enemy trucks.
You hold L1 to bring up your compass, in case you weren’t sure how to do it.
[Recovery Request] [V] Track Down a Chip with a Weird Symbol on It
This email should come from Thomas Southerland once you’ve connected the Distribution Center South of Lake Knot City to the chiral network. He’ll ask you to recover a storage chip that has a weird symbol on it, which he saw out by the crater near South Knot City.
Now, a new order should appear at the terminal at Distribution Center South of Lake Knot City.
[Order No. 71] [V] Recovery: Chip Engraved with a Mysterious Symbol
This order has you recover the chip mentioned in the email. While you might be tempted to think this is way out by South Knot City, it’s actually not that far south of the Distribution Center. Once you’ve returned it, you’ll get some rather unconventional unlocks:
- “J” has upgraded the compass (you can now choose to have your objective marker displayed at all times)
- V’s Face Pattern
[Recovery Request] [V] Retrieve My Chip from the MULEs
This email should show up once you’ve completed [Order No. 35]. It tells you to pick up a new order at Lake Knot City.
[Order No. 72] [V] Recovery: Chip Stolen by MULEs
Once you receive the email, you can pick up this order at Lake Knot City. It’s going to send you to a MULE camp to recover another memory chip.
- “J” has upgraded the compass (you can now temporarily disable sensor poles)
- Blueprint: Reverse Trike: “Yaiba Kusanagi” Type
[Recovery Request] [V] I’ve Lost Contact with the Porter Who Recovered My Chip
After completing [Order No. 43], you should get this email from your good pal V. This one asks you to check in at the Distribution Center North of Mountain Knot City.
[Order No. 73] [V] Recovery: Missing Porter and Chip
This delivery has you going into MULE territory to recover the lost memory chip. You’ll also have to incinerate the body of the porter, who has died.
- “J” has upgraded the compass (you can now temporarily short-circuit enemy odradeks)
- “Johnny” Sunglasses
[Recovery Request] [V] The Porter Had Not One, But Two Chips
You should receive this email after completing [Order No. 46]. As it turns out, the porter you incinerated had another chip, and that chip has now fallen into the hands of MULEs. Once you read this email, you’ll need to head over to Distribution Center North of Mountain Knot City and pick up the delivery marked with a [V].
[Order No. 74] [V] Retrieval: Chip from Terrorist Base
This order sends you back into MULE territory to recover another chip. It’s actually easier than the previous mission, since it doesn’t require you to incinerate a body, but the MULEs are more heavily armed at this point in the game, so you’ll still need to proceed with caution.
- “J” has upgraded the compass (you can now temporarily short-circuit enemy trucks)
- Blueprint: Silver Hand
[Recovery Request] [V] I Need You to Secure a Chip in BT Country
You should get your next email once you start Episode 8. This one sends you into “BT Country” to get another chip. You can pick up the order at Mountain Knot City.
[Order No. 75] [V] Recovery: Chip from BT Area
This is a pretty simple recovery mission that has you recover a lost memory chip from an area filled with snow and BTs. Thankfully, you should have the cord cutter by this point…
- “J” has upgraded the compass (compass features now use less battery)
- Hologram: Trauma Team AV (Cyberpunk 2077)
[Recovery Request] [V] My Chip! Grab it Back from the Terrorists!
Once you complete the game, you’ll get another email from your good friend “V.” This one sends you to Distribution Center South of Lake Knot City to pick up the final order.
[Order No. 76] [V] Retrieval: Chip from Terrorist-Occupied Ruins
This order sends you up to the ruined mall north of the Craftsman’s bunker. The good news is that the BTs are gone. The bad news is that terrorists have taken over the mall. You’ll have to pacify all of the terrorists, then pick up the chip at the terminal at the Ruined Shelter. Note that you won’t be able to use the terminal until all of the enemies have been knocked out.
Now just bring the chip back to Distribution Center South of Lake Knot City to claim your reward.
- Hologram: Creator (Cyberpunk 2077)
- Holgram: Jackie Wells (Cyberpunk 2077)
- “J” has upgraded the compass; its features now have increased range
Eastern Region UCA Facility Unlocks
Now we’re getting into the UCA facility unlocks. There are a few things to know before going into this section. First of all, if you earn a reward early — say you earn a “Sam” sunglasses color before you pick up the sunglasses — that reward will be held until the next star level. This means you’ll want to hold off on getting five stars with any facility before the end of Episode 3, when you unlock the backpack customization options. Otherwise, it’s possible that you’ll miss out on the 5-Star rewards (such as the backpack patch).
Also, I’m going to list unlocks at the lowest possible star level that I’ve been successful at unlocking a reward at. It is possible that you can unlock some rewards earlier than when they’re listed here, but I think it’s pretty unlikely.
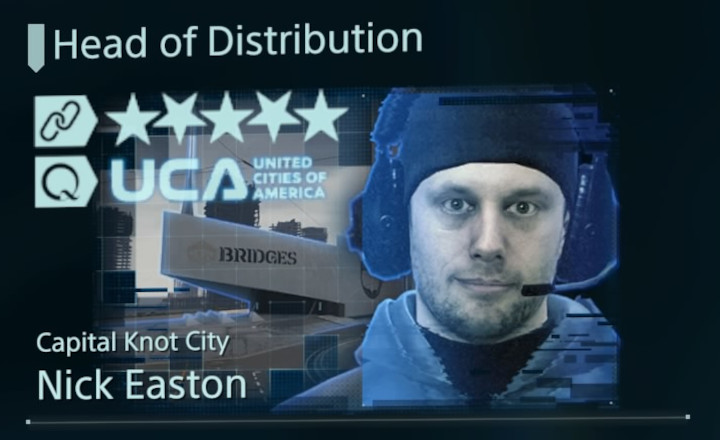
Capital Knot City – Nick Easton
This is basically the starting location. It will become available once you complete Episode 1.
3 Stars
- Interview Data: Egyptian Mummies, Pyramids, Etc.
- Interview Data: The Corals of the Seam
- Interview Data: Cryptobiotes
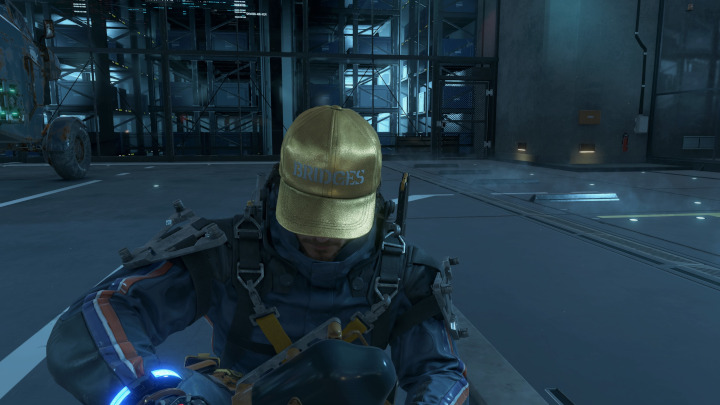
- BRIDGES Baseball Cap
Your default cap colors are:
- Cap Color: Snow White
- Cap Color: Stealth Black
- Cap Color: Bridges Orange
- Cap Color: Navy Blue
- Cap Color: Blood Red
- Cap Color: Signal Green
- Cap Color: Prismatic Purple
If you own the Digital Deluxe Edition, you’ll also have access to:
- Cap Color: Omnireflector
- Cap Color: Chiral Gold
4 Stars
- Hologram: Nick Easton
- Additional Delivery Bot
- Interview Data: BB Echolocation
- Interview Data: DOOMS and the Zodiac
5 Stars
- Interview Data: Fear as Pleasure
- Interview Data: The Egyptian View of the Brain
- Backpack Patch 12: Capital Knot City
- Star (for Sam’s pants)
Waystation West of Capital Knot City – George Baton
This facility will be available once you complete [Order No. 4] in Episode 2.
3 Stars
- Interview Data: Likes Secrete Oxytocin
- “Ludens Mask” Sunglasses Frame Color: Rose Pink
4 Stars
- Hologram: George Baton
- Interview Data: Chiralium Coatings
- “Sam” Sunglasses Frame Color: Rose Pink
- Cap Color: Rose Pink
5 Stars
- Backpack Patch 28: Special Delivery Team
- Star (for Sam’s pants)
Distribution Center West of Capital Knot City – Benjamin Hancock
This facility will be available once you complete [Order No. 5] in Episode 2.
3 Stars
- Hologram: Bridges Guard: Macho
4 Stars
- Hologram: Benjamin Hancock
5 Stars
- Backpack Patch 29: Special Security Team
- Star (for Sam’s pants)
Wind Farm – Jake Wind
This facility will be available once you complete [Order No. 9] in Episode 2.
3 Stars
- “Ludens Mask” Sunglasses Frame Color: Ghost Green
- Backpack Color: Ghost Green
4 Stars
- Hologram: Jake Wind
- Cap Color: Ghost Green
5 Stars
- “Sam” Sunglasses Frame Color: Ghost Green
- Backpack Patch 11: Central Knot City
- Star (for Sam’s pants)
The Ludens Fan

The Ludens Fan is an optional facility that can be interacted with once you’ve completed [Order No. 9] in Episode 2. Find lost cargo addressed to Ludens Fan and take it to the proper facility (due south of the Waystation West of Capital Knot City) to bring it into the Chiral Network.
And yes, that’s Geoff Keighley, the Game Awards guy…
2 Stars
- Hologram: Nendroid Jumbo Ludens
3 Stars
- “Ludens Mask” Sunglasses Frame Color: Coyote Brown
- Backpack Color: Coyote Brown
4 Stars
- Hologram: Ludens Fan
- “Sam” Sunglasses Frame Color: Coyote Brown
5 Stars
- Cap Color: Coyote Brown
- Backpack Patch 35: Ludens
- Star (for Sam’s pants)
- You now have permission to rest in this shelter.
The Musician
The Musician is another optional facility that you’ll unlock by finding a piece of cargo and delivering it. You should start looking for cargo once you’ve completed [Order No. 14]. If you can’t find any lost cargo to deliver, you can find the location and pick up [Order No. 172], which will have you picking up sheet music and returning it to the Musician.
2 Stars
- Harmonica
3 Stars
- “Ludens Mask” Sunglasses Frame Color: Cool Blue
- Backpack Color: Cool Blue
4 Stars
- Hologram: Musician
- “Sam” Sunglasses Frame Color: Cool Blue
5 Stars
- Cap Color: Cool Blue
- Backpack Patch 32: !
- Star (for Sam’s pants)
- You now have permission to rest in this shelter
Port Knot City – Viktor Frank
This facility will be available once you complete [Delivery No. 14] in Episode 2.
3 Stars
- Interview Data: Repatriates and Voidouts
- “Ludens Mask” Sunglasses Lens Color: Yellow
4 Stars
- Hologram: Viktor Frank
- Interview Data: Oxytocin
- Additional Delivery Bot
5 Stars
- Interview Data: Why Planes and Drones Can’t Fly
- “Sam” Sunglasses Lens Color: Yellow
- Backpack Patch 13: Port Knot City
- Star (for Sam’s pants)
Central Region UCA Facility Unlocks
Lake Knot City – William Lake
Once you cross the lake, you’ll start [Order No. 18]. Completing this order should give you access to Lake Knot City.
3 Stars
- “Ludens Mask” Sunglasses Lens Color: Blue
4 Stars
- Blueprint: Reverse Trike: Transporter
- Hologram: William Lake
- “Ludens Mask” Sunglasses Frame Color: Blue
5 Stars
- “Sam” Sunglasses Frame Color: Blue
- Backpack Patch 14: Lake Knot City
- Star (for Sam’s pants)
The Engineer
The Engineer joins the UCA when you complete [Order No. 19].
2 Stars
- Blueprint: Power Skeleton (Lv. 1)
- Blueprint: Power Skeleton: Silver (Lv. 1)
- Blueprint: Power Skeleton: Gold (Lv. 1)
- Blueprint: Smoke Grenade (Lv. 1)
- Interview Data: The Evo-Devo Unit
- Interview Data: Prepper Interview: The Engineer
- Interview Data: The Chiral Network II
3 Stars
- Blueprint: Power Skeleton (Lv. 2)
- Blueprint: Power Skeleton: Silver (Lv. 2)
- Blueprint: Power Skeleton: Gold (Lv. 2)
- Blueprint: Smoke Grenade (Lv. 2)
4 Stars
- Blueprint: Power Skeleton (Lv. 3)
- Blueprint: Power Skeleton: Silver (Lv. 3)
- Blueprint: Power Skeleton: Gold (Lv. 3)
- Hologram: Engineer
- Interview Data: Fragile’s Umbrella and Suit
5 Stars
- Backpack Patch 19: UCA/A
- Star (for Sam’s pants)
- You now have permission to rest in this shelter
Note: The Silver and Gold Power Skeleton options are only available if you own the Digital Deluxe Edition of the game.
The Elder
The Elder will allow you to link up once you complete [Order No. 20], though he’s hesitant to become a part of the UCA. He will formally join once you upgrade his connection level to 2 Stars.
2 Stars
- UCA Terminal options
- Blueprint: Vog-Emitting Decoy Cargo
- Interview Data: The America of the Past
3 Stars
- Interview Data: Prepper Shelters
- “Ludens Mask” Sunglasses Frame Color: Grass Green
- Backpack Color: Grass Green
4 Stars
- Hologram: Elder
- “Sam” Sunglasses Frame Color: Grass Green
5 Stars
- Cap Color: Grass Green
- Backpack Patch 43: Golden Toadstool (S)
- Star (for Sam’s pants)
- You now have permission to rest in this shelter
Note: The Elder will occasionally gift you High-Density resources for completing deliveries.
The Craftsman
Once you complete [Order No. 21] and [Order No. 22], the Craftsman will agree to join the UCA.
2 Stars
- Blueprint: Bola Gun (Lv. 1)
- Interview Data: Terrorists Posing as Fragile Express Couriers
- Firing Range Drill 8: [Bola Gun] Eliminate all MULEs
- Firing Range Drill 10: [Bola Gun] Eliminate all BTs
3 Stars
- Blueprint: Bola Gun (Lv. 2)
- Hologram: Watcher (Horizon Zero Dawn): Happy
- Hologram: Watcher (Horizon Zero Dawn): Vigilant
4 Stars
- Hologram: Aloy (Horizon Zero Dawn)
- Hologram: Craftsman
- Interview Data: King Midas and Chiral Crystals
- Interview Data: Fragile’s Father and Fragile Express
5 Stars
- Hologram: Tallneck (Horizon Zero Dawn)
- Backpack Patch 15: Middle Knot City
- Star (for Sam’s pants)
- You now have permission to rest in this shelter
Extra: Quite often, when you complete a delivery to the Craftsman, he will give you a gift:
- Tool: Custom Hematic Grenades
Peter Engert
Peter Engert’s bunker is an optional facility that you will be delivering pizzas to. Your first pizza delivery should appear at Lake Knot City once you’ve received an email from Peter Engert in Episode 3. This should pop sometime around [Order No. 23]. Increase your connection level by delivering more pizzas. Pizza deliveries should appear over the course of the game.
Don’t worry if the connection level isn’t increasing; it should automatically go up to five stars once you complete [Order No. 66] late in the game.
3 Stars
- Blueprint: Handgun (HG Custom)
- Hologram: Higgs: Big Five
4 Stars
- Blueprint: Shotgun (HG Custom)
- Blueprint: Riot Shotgun (HG Custom)
- Hologram: Higgs: Let’s Go
5 Stars
- Blueprint: Assault Rifle (HG Custom)
- Non-Lethal Assault Rifle (HG Custom)
- Backpack Patch 40: Higgs
- Star (for Sam’s pants)
- Hologram: Higgs: Welcome
- UCA Terminal options
Distribution Center South of Lake Knot City – Thomas Southerland

You’ll gain access to this facility by completing [Order No. 24] in Episode 3.
2 Stars
- Blueprint: Bridges Boots (Lv. 2)
- Interview Data: Drones and the Singularity
3 Stars
- Blueprint: Truck: Long Range (Lv. 1)
- Vehicle Color: Olive Drab
- Vehicle Color: Navy Blue
- Vehicle Color: Wolf Gray
- Vehicle Color: Stealth Black
- Vehicle Color: Bridges Orange
- Vehicle Color: Blood Red
- Vehicle Color: Signal Green
- Vehicle Color: Prismatic Purple
4 Stars
- Blueprint: Truck: Long Range (Lv. 2)
- Hologram: Thomas Southerland
- Vehicle Color: Emergency Yellow
- Vehicle Color: Sandy Tan
- Vehicle Color: Coyote Brown
- Vehicle Color: Express Purple
- Vehicle Color: Cool Blue
- Vehicle Color: Snow White
- Vehicle Color: Rose Pink
5 Stars
- Blueprint: Truck: Long Range (Lv. 3)
- Vehicle Color: Grass Green
- Vehicle Color: Mars Red
- Vehicle Color: Desert Pink
- Vehicle Color: Ghost Green
- Vehicle Color: Lightning Blue
- Vehicle Color: Bright Yellow
- Vehicle Color: Volcano Orange
- Backpack Patch 25: Bridges General Staff
- Star (for Sam’s pants)
Weather Station – Alex Weatherstone
This facility will connect to the chiral network once you complete [Order No. 27] in Episode 3.
2 Stars
- PCC (Lv. 2)
- Floating Carrier (Lv. 1)
- Interview Data: Chiral Clouds and Timefall
3 Stars
- Blueprint: Floating Carrier (Lv. 2)
- Interview Data: Evolution, Death Stranding and the Fear of Dying
4 Stars
- Hologram: Alex Weatherstone
- Backpack Accessory: Weather Talisman
5 Stars
- Backpack Patch 22: BRIDGES – A
- Star (for Sam’s pants)
The Timefall Farmer
The Timefall Farmer will join the UCA once you complete [Order No. 28] in Episode 3.
2 Stars
- Interview Data: Prepper Interview: The Timefall Farmers
- Odradek Feature: Scanner Nullification
3 Stars
- Odradek Feature: Human Detection
4 Stars
- Hologram: Timefall Farmer
- Hologram: Environmental Scientist
5 Stars
- Hologram: Goose
- Backpack Patch 33: Rain
- Star (for Sam’s pants)
The Timefall Farmer will also occasionally give you Lightweight resources as a gift after making a delivery.
The Junk Dealer
You’ll meet the Junk Dealer once you complete [Order No. 30], but he’s going to make you jump through some hoops before he’s willing to have anything to do with you. You’ll also have to complete [Order No. 32], [Order No. 33], and [Order No. 34] before he’ll join the UCA.
2 Stars
- Blueprint: Speed Skeleton (Lv. 1)
- Blueprint: Speed Skeleton: Silver (Lv. 1)
- Blueprint: Speed Skeleton: Gold (Lv. 1)
- Blueprint: Stun Bomb
- Interview Data: Prepper Interview: The Junk Dealer
- Interview Data: An Asexual World
- Firing Range Drill 5: [Thrown Weapons] Eliminate all MULEs
3 Stars
- Blueprint: Speed Skeleton (Lv. 2)
- Blueprint: Speed Skeleton: Silver (Lv. 2)
- Blueprint: Speed Skeleton: Gold (Lv. 2)
4 Stars
- Blueprint: Remote Stun Bomb
- Hologram: Junk Dealer
5 Stars
- Blueprint: Speed Skeleton (Lv. 3)
- Blueprint: Speed Skeleton: Silver (Lv. 3)
- Blueprint: Speed Skeleton: Gold (Lv. 3)
- Backpack Patch 2: Truck
- Star (for Sam’s pants)
- You now have permission to rest in this shelter.
The Junk Dealer will often gift you a Custom Chiral Ladder when you make a delivery.
Also, the patch description is incorrect when you first unlock it (but it will be correct once you visit your private room to equip it).
Chiral Artist’s Studio
You’ll bring the Chiral Artist’s Studio into the chiral network by completing [Order No. 32].
2 Stars
- Anti-BT Handgun (Lv. 1)
- Firing Range Drill 13: [Handgun/Assault Rifle] Destroy all Targets
- Firing Range Drill 15: [Handgun/Assault Rifle] Eliminate all BTs
3 Stars
- Blueprint: Anti-BT Handgun (Lv. 2)
- Backpack Color: Chiral Gold
4 Stars
- Hologram: Chiral Artist
- Hologram: Chiral Artist’s Mother
- Vehicle Color: Chiral Gold
5 Stars
- Backpack Patch 41: Handprint
- Star (for Sam’s pants)
- You now have permission to rest in this shelter
The Chiral Artist will occasionally gift you with Chiral Boots when you make a delivery.
Film Director
The Film Director will link up with the chiral network upon completion of [Order No. 31], but he won’t join the UCA until you rank up his connection to two stars.
2 Stars
- UCA Terminal options
- Odradek Feature: Hologram Generator
3 Stars
- “Ludens Mask” Sunglasses Frame Color: Wolf Gray
- Backpack Color: Wolf Gray
4 Stars
- Hologram: Film Director
- “Sam” Sunglasses Frame Color: Wolf Gray
5 Stars
- Cap Color: Wolf Gray
- Backpack Patch 36: Octopus BT
- Star (for Sam’s pants)
- You now have permission to rest in this shelter
The Film Director will occasionally gift you with high-density materials when you make a delivery.
The Cosplayer
Late in Episode 3, you’ll see an optional delivery [Order No. 37] show up at the Distribution Center South of Lake Knot City, which asks you to deliver some sewing supplies to the Cosplayer. She’ll also introduce you to her partner, played by Conan O’Brien. She’ll join the network right away, but she won’t join the UCA until her connection level reaches two stars.
2 Stars
- UCA Terminal options
- Backpack Equipment: Utility Pouch
3 Stars
- Backpack Equipment: Large Grenade Pouch
4 Stars
- Hologram: Wandering MC
- Hologram: Cosplayer
5 Stars
- Backpack Color: Omnireflector
- Backpack Patch 34: Smile
- Star (for Sam’s pants)
- You now have permission to rest in this shelter
The Collector

The Collector has a bunker hidden deep in a ravine to the south of Distribution Center South of Lake Knot City. Check out the location on the map above. He’ll have a couple recovery missions for you, which will get your connection level started. You’ll have to rank up his connection to one full star before he’ll let you log him into the chiral network. At two stars, he will join the UCA.
1 Star
- “Ludens Mask” Sunglasses Frame Color: Emergency Yellow
2 Stars
- UCA Terminal options
- Backpack Cover (Lv. 1)
3 Stars
- Hologram: Collector
- Backpack Color: Emergency Yellow
4 Stars
- “Sam” Sunglasses Frame Color: Emergency Yellow
- Backpack Cover (Lv. 2)
5 Stars
- Cap Color: Emergency Yellow
- Backpack Patch 20: UCA – B
- Star (for Sam’s pants)
- You now have permission to rest in this shelter
South Knot City – Owen Southwick
2 Stars
- Blueprint: Handgun (Lv. 1)
- Blueprint: Assault Rifle (Lv. 1)
- Blueprint: Grenade
- Interview Data: The Situation After the First Death Stranding Incident
- Interview Data: No Blue in the Inverted Rainbow
- Interview Data: Giant BTs
- Firing Range Drill 14: [Handgun/Assault Rifle] Eliminate all MULEs
3 Stars
- Blueprint: Reverse Trike: Defensive
- Blueprint: Handgun (Lv. 2)
4 Stars
- Blueprint: Truck: Defensive
- Hologram: Own Southwick
- Additional Delivery Bot
5 Stars
- Backpack Patch 16: South Knot City
- Star (for Sam’s pants)
Waystation North of Mountain Knot City – Charles Khan
Pick up [Order No. 41] at Distribution Center South of Lake Knot City to get started on this one. This should happen toward the beginning of Episode 5.
2 Stars
- Blueprint: Armor Plate (Lv. 1)
- Blueprint: Armor Plate: Silver (Lv. 1)
- Blueprint: Armor Plate: Gold (Lv. 1)
- Blueprint: Non-Lethal Assault Rifle (Lv. 1)
- Interview Data: The History of the Odradek
- Interview Data: BTs Come in All Shapes and Sizes
3 Stars
- Blueprint: Armor Plate (Lv. 2)
- Blueprint: Armor Plate: Silver (Lv. 2)
- Blueprint: Armor Plate: Gold (Lv. 2)
- Hologram: Bridges Guard: UCA!
4 Stars
- Blueprint: Armor Plate (Lv. 3)
- Blueprint: Armor Plate: Silver (Lv. 3)
- Blueprint: Armor Plate: Gold (Lv. 3)
- Hologram: Charles Khan
5 Stars
- Blueprint: Armor Plate (Lv. 4)
- Blueprint: Armor Plate: Silver (Lv. 4)
- Blueprint: Armor Plate: Gold (Lv. 4)
- Backpack Patch 26: Corpse Disposal
- Star (for Sam’s pants)
Note: The Silver and Gold Armor options are only available if you own the Digital Deluxe Edition of the game.
Distribution Center North of Mountain Knot City – Phillip North
Complete [Order No. 43] in Episode 5 to add this facility to the UCA.
2 Stars
- Blueprint: Assault Rifle (Lv. 2)
- Blueprint: Non-Lethal Assault Rifle (Lv. 2)
- Interview Data: Near Death Experience
- Firing Range Drill 9: [Bola Gun] Eliminate all Terrorists
- Firing Range Drill 15: [Handgun/Assault Rifle] Eliminate all Terrorists
3 Stars
- Interview Data: Antimatter in Storage
- Backpack Equipment: Spare Ammo Pouch (Lv. 1)
4 Stars
- Hologram: Philip North
- Backpack Equipment: Extra Battery (Lv. 2)
5 Stars
- Backpack Equipment: Extra Battery (Lv. 3)
- Backpack Equipment: Extra Battery (Lv. 4)
- Backpack Patch 27: Medical
- Star (for Sam’s pants)
Novelist’s Son
Once you’ve gotten Distribution Center North of Mountain Knot City connected to the UCA, you should start seeing packages scattered around the area that are addressed to the Novelist’s Son. To interact with him, you must pick up one of these packages and deliver it to him.
Now, some people say that the Novelist’s Son is a bit finnicky. You’ll have to find his missing packages in the wild if you want to increase his connection rating, with the added quirk that you must also read all his emails in between drop-offs. You won’t be able to increase his connection rating beyond a certain point unless you’ve read all those doggone emails.
So the best way to do this is to bring him a package, then go sleep in a private room. If you get an email, read it, then repeat the process. If you don’t, well, try sleeping again to see if you can get the email to show up in your inbox. Or, worst-case scenario, you could spend some time working on something else in the game for a while to see if the email eventually shows up.
However, in the Director’s Cut, I never had any issues with the Novelist’s Son. It’s possible this was addressed in the update, or that it’s a bug that only affects certain users. If you’re having trouble with his connection level not increasing, just make sure you read his emails.
And if you’re struggling to find the Novelist’s Son, here’s where he is on the map:
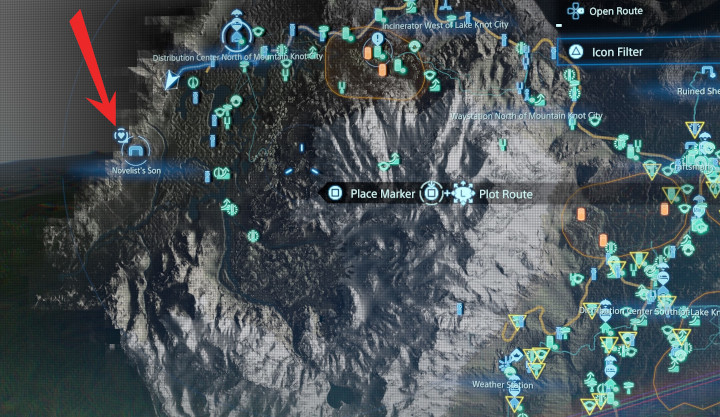
He will connect to the chiral network once you reach one star, and he’ll join the UCA at two stars.
1 Star
- “Ludens Mask” Sunglasses Frame Color: Sandy Tan
2 Stars
- UCA Terminal options
- Backpack Accessory: Bell
3 Stars
- “Sam” Sunglasses Frame Color: Sandy Tan
- Backpack Color: Sandy Tan
4 Stars
- Hologram: Novelist’s Son
5 Stars
- Cap Color: Sandy Tan
- Backpack Patch 42: Cryptobiote
- Star (for Sam’s pants)
- You now have permission to rest in this shelter
The Novelist’s Son will occasionally gift you with D-Cryptobiote for making deliveries.
Mountain Knot City – Aaron Hill
You’ll first head to Mountain Knot City for [Order No. 44] as part of Episode 5. Of course, it’s not going to be easy to convince Lockne to join the UCA, because nothing is ever easy in Death Stranding. But once you complete [Order No. 46] at the end of Episode 5, she’ll be ready to connect.
3 Stars
- Blueprint: Assault Rifle (Lv. 3)
- Blueprint: Non-Lethal Assault Rifle (Lv. 3)
- Interview Data: Bridges Needs Homo Ludens
4 Stars
- Hologram: Aaron Hill
- Additional Delivery Bot
- Blueprint: Stabilizer (Lv. 2)
5 Stars
- Blueprint: Stabilizer (Lv. 3)
- Backpack Patch 17: Mountain Knot City
- Star (for Sam’s pants)
The Roboticist
Once you’ve traveled up to Mountain Knot City for [Order No. 44], you can head up into the mountains to the southeast. You’ll start seeing packages addressed to the Roboticist. If you can find her and return one of her packages, she’ll be glad to join the chiral network and the UCA.
Due south of Mountain Knot City is a lake that looks like an upside-down heart. The Roboticist is to the east of it. Here’s a map to help you find it:
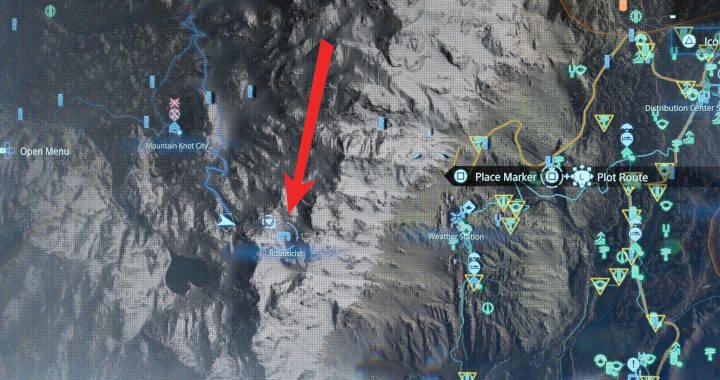
Of course, you could also wait until Episode 6, in which you’ll be sent out to the Roboticist’s bunker as part of the main story.
2 Stars
- Blueprint: All-terrain Skeleton (Lv. 1)
- Blueprint: All-terrain Skeleton: Silver (Lv. 1)
- Blueprint: All-terrain Skeleton: Gold (Lv. 1)
3 Stars
- Blueprint: All-terrain Skeleton (Lv. 2)
- Blueprint: All-terrain Skeleton: Silver (Lv. 2)
- Blueprint: All-terrain Skeleton: Gold (Lv. 2)
- Hologram: The Roboticist
4 Stars
- Blueprint: All-terrain Skeleton (Lv. 3)
- Blueprint: All-terrain Skeleton: Silver (Lv. 3)
- Blueprint: All-terrain Skeleton: Gold (Lv. 3)
- Hologram: The Roboticist’s Son
5 Stars
- Hologram: Delivery Bot
- Backpack Patch 47: Buddy Bot
- Star (for Sam’s pants)
- You now have permission to rest in this shelter
Note: The Silver and Gold Skeleton options are only available if you own the Digital Deluxe Edition of the game.
The Doctor
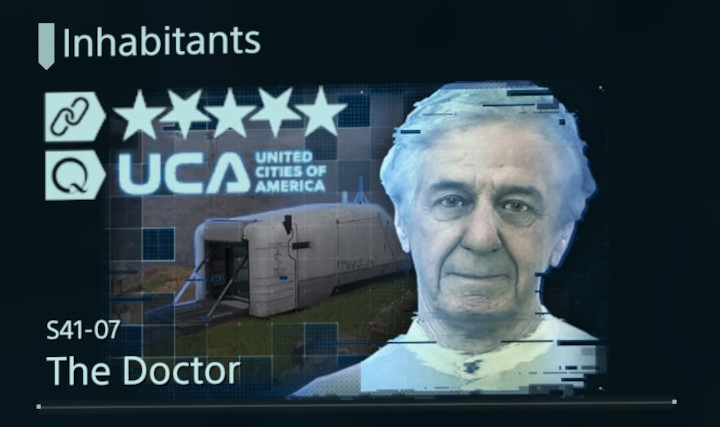
You’ll be introduced to the Doctor at the beginning of Episode 6, though you’ll start finding packages addressed to the Doctor before that. You can activate the facility early if you want, or you can wait until Episode 6 to start working on it. The Doctor will join the UCA upon your first delivery.
2 Stars
- Canteen (Lv. 2)
3 Stars
- Interview Data: Prepper Interview: The Doctor
- “Ludens Mask” Sunglasses Frame Color: Olive Drab
- Backpack Color: Olive Drab
4 Stars
- Hologram: Doctor
- Hologram: Medical Device Engineer
- “Sam” Sunglasses Frame Color: Olive Drab
5 Stars
- Cap Color: Olive Drab
- Backpack Patch 44: Golden Toadstool (M)
- Star (for Sam’s pants)
- You now have permission to rest in this shelter
The Doctor will occasionally gift you with High-capacity Blood Bags for completing deliveries.
The Mountaineer
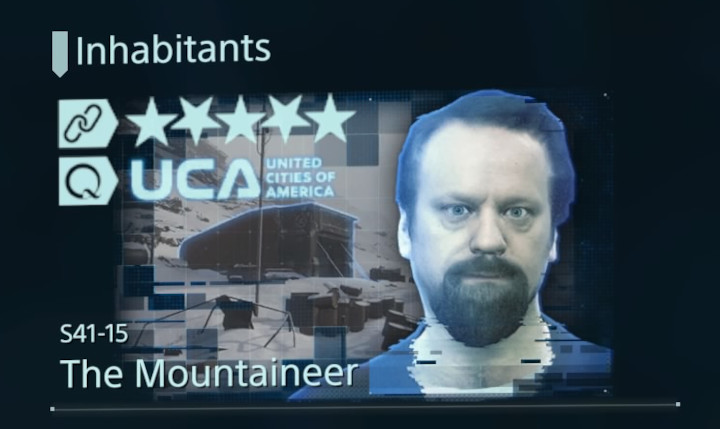
[Order No. 49] in Episode 6 will take you to the Mountaineer, but you’ll need to do [Order No. 50] before he’ll connect to the network and join the UCA.
2 Stars
- Blueprint: Bridges Boots (Lv. 3)
- Blueprint: Power Gloves
- Blueprint: Power Gloves: Silver
- Blueprint: Power Gloves: Gold
- Interview Data: Prepper Interview: The Mountaineer
3 Stars
- “Ludens Mask” Sunglasses Frame Color: Express Purple
- Backpack Color: Express Purple
4 Stars
- Hologram: Mountaineer
- Hologram: Mountain Guide
- “Sam” Sunglasses Frame Color: Express Purple
5 Stars
- Cap Color: Express Purple
- Backpack Patch 45: Golden Toadstool (L)
- Star (for Sam’s pants)
- You now have permission to rest in this shelter
The Mountaineer will occasionally gift you with a Custom Chiral Climbing Anchor for completing a successful delivery.
The Photographer
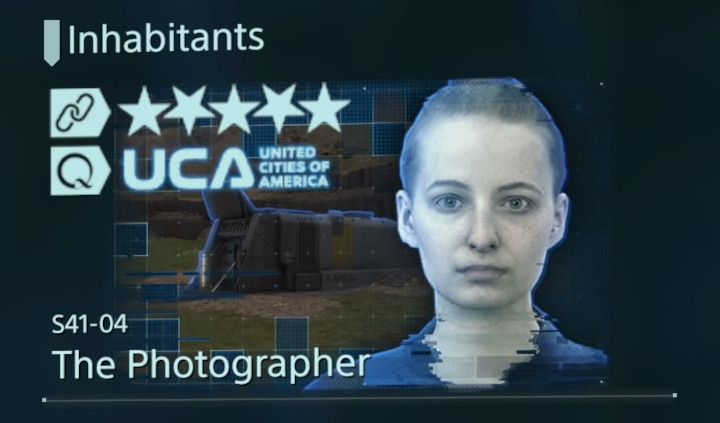
[Order No. 51] in Episode 6 will send you to the Photographer, but you’ll also need to complete [Order No. 52] before she’ll join the UCA.
2 Stars
- Blueprint: Shotgun (Lv. 1)
- Blueprint: Riot Shotgun (Lv. 1)
- Interview Data: Prepper Interview: The Photographer
- Firing Range Drill 18: [Shotgun] Destroy all Targets
- Firing Range Drill 19: [Shotgun] Eliminate all MULEs
- Firing Range Drill 20: [Shotgun/Thrown Weapons] Eliminate all Targets
3 Stars
- Blueprint: Shotgun (Lv. 2)
- Firing Range Drill 21: [Shotgun] Eliminate all BTs
4 Stars
- Blueprint: Riot Shotgun (Lv. 2)
- Hologram: Photographer
- Hologram: Photographer’s Mother
5 Stars
- Backpack Patch 37: Monstrous BT
- Star (for Sam’s pants)
- You now have permission to rest in this shelter
The Photographer will occasionally gift you with Resins (Lightweight) as a reward for completing deliveries.
The Spiritualist
You’ll be guided to the Spiritualist’s bunker in [Order No. 53] in Episode 6.
2 Stars
- Interview Data: Prepper Interview: The Spiritualist
- Backpack Accessory: Love Knot
3 Stars
- “Ludens Mask” Sunglasses Frame Color: Bright Yellow
- Backpack Color: Bright Yellow
- Backpack Accessory: One Dollar Coin
4 Stars
- Hologram: Spiritualist
- Cap Color: Bright Yellow
5 Stars
- Hologram: Raccoon
- “Sam” Sunglasses Frame Color: Bright Yellow
- Backpack Patch 21: UCA – C
- Star (for Sam’s pants)
- You now have permission to rest in this shelter
The Spiritualist will occasionally gift you with lightweight resources after making successful deliveries.
The First Prepper
The First Prepper is an optional bunker that you might stumble upon while you’re exploring the mountains in Episodes 6 and 8. Like the Novelist’s Son, people claim that this one can be finnicky, so you should always read his emails when they pop if you want to continue to progress his connection level. Unlike the Novelist’s Son, I actually did have some struggles with this in Director’s Cut, and reading the emails definitely seems to help.
The First Prepper will connect to the network at one star, and he’ll join the UCA at two stars.
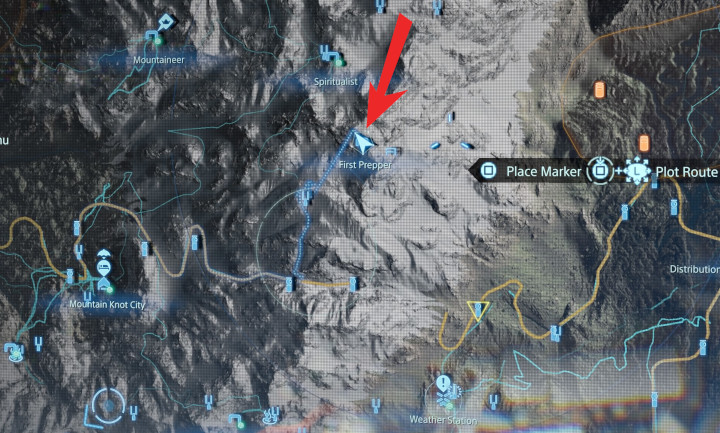
You’ll find his bunker south of the Spiritualist and slightly to the north of where Deadman’s cabin was. Here it is on a map:
1 Star
- Santa Hat
2 Stars
- UCA Terminal options
- Backpack Accessory: Bridges Energy
3 Stars
- Hologram: First Prepper
- “Ludens Mask” Sunglasses Frame Color: Desert Pink
- Backpack Color: Desert Pink
4 Stars
- Hologram: Wolf
- Cap Color: Desert Pink
5 Stars
- “Sam” Sunglasses Frame Color: Desert Pink
- Backpack Patch 46: Pathfinder
- Star (for Sam’s pants)
- You now have permission to rest in this shelter
Heartman’s Lab
You’ll need to make your way to Heartman’s Lab for [Order No. 55] during Episode 8.
2 Stars
- Blueprint: Thermal Pad
3 Stars
- Hologram: BT
- “Ludens Mask” Sunglasses Frame Color: Lightning Blue
- Backpack Color: Lightning Blue
4 Stars
- Cap Color: Lightning Blue
- Backpack Accessory: Cryptobiote
5 Stars
- “Sam” Sunglasses Color: Lightning Blue
- Backpack Patch 24: BRIDGES – C
- Star (for Sam’s pants)
The Geologist
In Episode 8, [Order No. 58] will take you to the Geologist.
2 Stars
- Blueprint: Climbing Anchor (Lv. 2)
- Interview Data: Interview with the Geologist
3 Stars
- “Ludens Mask” Sunglasses Frame Color: Mars Red
- Backpack Color: Mars Red
4 Stars
- Hologram: Geologist
- “Sam” Sunglasses Color: Mars Red
5 Stars
- Cap Color: Mars Red
- Backpack Patch 23: BRIDGES – B
- Star (for Sam’s pants)
- You now have permission to rest in this shelter
The Geologist will occasionally gift you with high-density resources as a reward for completing deliveries.
The Paleontologist
In Episode 9, [Order No. 59] will take you to the Paleontologist.
2 Stars
- Blueprint: Oxygen Mask
- Blueprint: Hematic Grenade (Lv. 2)
- Interview Data: Interview with the Paleontologist
3 Stars
- “Ludens Mask” Sunglasses Frame Color: Volcano Orange
- Backpack Color: Volcano Orange
4 Stars
- Hologram: Paleontologist
- Cap Color: Volcano Orange
5 Stars
- “Sam” Sunglasses Color: Volcano Orange
- Backpack Patch 38: Giant BT
- Star (for Sam’s pants)
- You now have permission to rest in this shelter
The Paleontologist will occasionally gift you with lightweight resources after making successful deliveries.
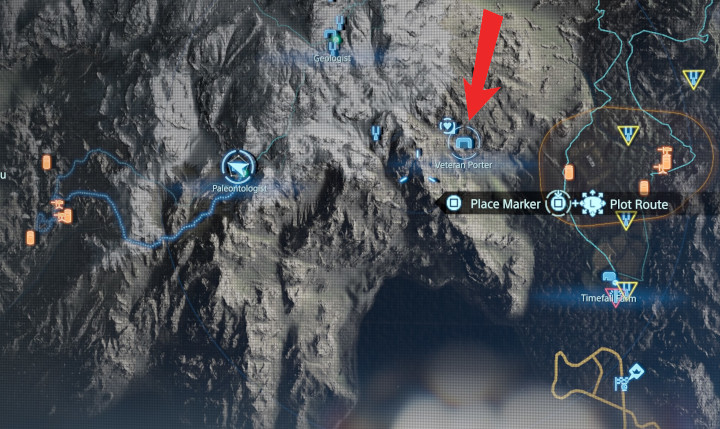
Veteran Porter
The Veteran Porter is the last optional facility you’ll find. As you might suspect, he’s a bit reluctant to join the UCA, but a few deliveries ought to change his mind. At one star, he’ll connect to the chiral network, and at two he’ll join.
Like the Novelist’s Son and the First Prepper, the Veteran Porter’s connection progress will be gated behind emails. What makes this one especially bad, however, is that there are so few deliveries going to him, and so few packages to find in the wild. This one could take you some time.
The Veteran Porter is east of the Paleontologist and southeast of the Geologist. In case you want to see that on a map, it’s right here:
1 Star
- Vehicle Color: Omnireflector
2 Stars
- UCA Terminal options
- Backpack Accessory: Porter
3 Stars
- Hologram: Veteran Porter: Encouraging
4 Stars
- Hologram: Veteran Porter: On a Delivery
5 Stars
- Holgram: Veteran Porter: Kung Fu
- Backpack Patch 30: Porter
- Star (for Sam’s pants)
- You now have permission to rest in this shelter
The Veteran Porter will occasionally gift you with lightweight materials after making a successful delivery.
The Evo-devo Biologist
2 Stars
- Blueprint: Grenade Launcher
- Interview Data: Interview with the Evo-devo Biologist
- Interview Data: Tar Bubbles Up From the Beach
- Firing Range Drill 23: [Grenade/Rocket Launcher] Destroy all Targets
- Firing Range Drill 24: [Grenade/Rocket Launcher] Eliminate all MULEs
- Firing Range Drill 25: [Grenade/Rocket Launcher] Eliminate all Terrorists
- Firing Range Drill 26: [Grenade/Rocket Launcher] Eliminate all BTs
- Firing Range Drill 28: [Battle Simulation] Eliminate all MULEs
3 Stars
- “Ludens Mask” Sunglasses Lens Color: Red
4 Stars
- Blueprint: Multi-Rocket Launcher
- Hologram: Evo-devo Biologist
5 Stars
- “Sam” Sunglasses Lens Color: Red
- Backpack Patch 39: Whale BT
- Star (for Sam’s pants)
- You now have permission to rest in this shelter
The Evo-devo Biologist will occasionally gift you with high-density resources after a successful delivery.
Chiral Relay
This is the last station in the Central Region, and it doesn’t have a star level.
Western Region
Distribution Center North of Edge Knot City
This facility doesn’t have a star level. Bring it into the UCA to unlock:
- Blueprint: Remote-Detonation Grenade Launcher
Memory Chip Unlocks
Most Memory Chips will unlock data in your log, but there are a few that unlock more than that. I will skip the ones that don’t have additional unlocks attached to them for the sake of this already massive guide (but here’s a Memory Chip guide if you really want one).
So let’s look specifically at the ones that have additional unlocks:
Memory Chip 31 – Reverse Trike: “Ride” Type
This memory chip actually unlocks a new blueprint. Check out the video above to see the exact location. For turning it in, you’ll unlock:
- Blueprint: Reverse Trike: “Ride” Type
Memory Chip 54 – An Unknown Man’s Journal: Part 1
You’ll find this memory chip near the ruined shelter to the north of the Craftsman’s bunker. If you want to know the specific location for this memory chip, check out the video above.
- Interview Data: Journal #1
- Interview Data: Journal #2
- Interview Data: Journal #3
- Interview Data: Journal #4
Memory Chip 55 – An Unknown Man’s Journal: Part 2
You’ll find this memory chip in the ruins outside South Knot City. To see the exact location, check out the video above. For turning it in, you will unlock:
- Interview Data: Journal #5
- Interview Data: Journal #6
- Interview Data: Journal #7
- Interview Data: Journal #8
- Interview Data: Journal #9
Memory Chip 56 – An Unknown Man’s Journal: Part 3
When you complete the optional [Order No. 66], you’ll deliver one last pizza to Peter Englert. Once this last delivery is available to you, the bunker will be unlocked and you can go inside it. You’ll find the memory chip on a desk inside this bunker.
- Interview Data: Journal #10
- Interview Data: Journal #11
- Interview Data: Journal #12
- Interview Data: Journal #13
- Interview Data: Journal #14
- Interview Data: Journal #15
- Interview Data: Journal #16
- Interview Data: Journal #17
- Interview Data: Journal #18
- Interview Data: Journal #19
- Interview Data: Journal #20
- Interview Data: Journal #21
- Interview Data: Journal #22
- Interview Data: Journal #23
Lucy’s Report
There are additional interviews that you’ll unlock by completing certain Standard Orders, including Lucy’s Report. This is a series of 13 interviews. You’ll unlock the first eight by doing specific deliveries throughout the game. The rest of them will be unlocked in post-game (see the next section).
These orders won’t always be available, but the game tends to cycle through available orders. If you can’t find a specific one, pick up some of the other orders at that facility, deliver them, then check back to see if new orders are available. It might take a little time, but if you’re persistent and you know where to look, it shouldn’t be difficult to unlock all of Lucy’s Report.
[Order No. 586] Delivery: Authentic Coffee-making Kit
Pick this up at Heartman’s Lab. It has you making a delivery to the Roboticist.
- Interview Data: Report #1
[Order No. 588] Delivery: Pre-Stranding Medical Texts
Pick this up at Heartman’s Lab. It has you making a delivery to the Doctor.
- Interview Data: Report #2
[Order No. 597] Delivery: Precious Media from the Analog Age
Pick this up at Heartman’s Lab. It has you making a delivery to Mountain Knot City.
- Interview Data: Report #3
[Order No. 584] Delivery: Legendary “Aqua Vitae” Whiskey
Pick this up at Mountain Knot City. It has you making a delivery to Heartman’s Lab.
- Interview Data: Report #4
[Order No. 585] Delivery (Fragile) 20th Century Rock Records
Pick this up at Mountain Knot City. It has you making a delivery to Heartman’s Lab.
- Interview Data: Report #5
[Order No. 544] Delivery: Heart Medicine
Pick this up at Distribution Center North of Mountain Knot City. It has you making a delivery to Heartman’s Lab.
- Interview Data: Report #6
[Order No. 545]
Pick this up at Distribution Center North of Mountain Knot City. It has you making a delivery to Heartman’s Lab.
- Interview Data: Report #7
[Order No. 333] Delivery (Fragile): Legendary Bâtard-Montrachet Wine
Pick this up at the Doctor. It has you making a delivery to Heartman’s Lab.
- Interview Data: Report #8
Post-Game Interviews
Aside from Lucy’s report, you’ll also be unlocking more interviews. Some people claim that these require you to get Legend, Legend of Legends, or Legend of Legend of Legends ratings in order to get these interviews, but that wasn’t the case for me.
I don’t know the exact number of deliveries to trigger each batch, but I was earning these at a rapid clip. I’m also not sure if the order you unlock these in is randomized at all. I’ve just separated them into batches so you can see what interview data is out there.
Batch 1
- Interview Data: Memo #4: From Mother to Daughter
- Interview Data: Memo #5: From Mother to Daughter
Batch 2
- Interview Data: Clifford Unger Case Review Part #1
- Interview Data: Clifford Unger Case Review Part #2
- Interview Data: Clifford Unger Case Review Part #3
- Interview Data: Die-Hardman’s Background #1
- Interview Data: Die-Hardman’s Background #2
Batch 3
- Interview Data: My Mother’s Misanga
Batch 4
- Interview Data: Higgs’s Journal: Coffin #1
- Interview Data: Higgs’s Journal: Coffin #2
Batch 5
- Interview Data: Die-Hardman’s Confession: Bridget’s BB Experiments – Part 1
- Interview Data: Die-Hardman’s Confession: Bridget’s BB Experiments – Part 2
Batch 6
- Interview Data: Report: Concerning the Voidout in the Satellite Town of UCA-01-002, Near Central Knot City
Batch 7
- Interview Data: What Became of Heartman
Batch 8
- Interview Data: What Became of Deadman
Batch 9
- Interview Data: What Became of Målingen and Lockne
Batch 10
- Interview Data: What Became of Fragile
Batch 11
- Interview Data: Designing the UCA Flag
Batch 12
- Interview Data: The President’s Ghost #1
Batch 13
- Interview Data: The President’s Ghost #2
Batch 14
- Interview Data: An Ageless President?
- Interview Data: Report #9
Batch 15
- Interview Data: Da Vinci’s “Madonna of the Yarnwinder”
- Interview Data: Report #10
Batch 16
- Interview Data: Bridget’s Necklace
- Interview Data: Discovering America
- Interview Data: Report #11
Batch 17
- Interview Data: Report #12
Battery level 4 is actually unlocked by delivery 85? where you rescue a porter from far south
I got it when I upgraded Distribution Center North of Mountain Knot City to 5 stars. I got “Other Me” and a bunch of bot colors for completing Order 85. It’s been several months since I’ve done this, so I did a quick Google search, and it turns out this user got the same rewards that I have listed here:
https://dailydeathstranding.wordpress.com/2021/10/16/order-no-85-rescue-rookie-porter-whos-in-trouble/